Scripting visual effects for video with BASH, FFMPEG, Script-FU & GIMP filters
Recently I've been working on an animated music video for Mammoth Life. The concept involves creating a wax-crayon hand drawn look while mixing live action video with 2d animation. For the live action footage I needed to find a way to process it to make it appear as if it were hand drawn with crayons. Using a combination of FFMPEG and GIMP and some BASH scripting I've been able to come up with a pretty solid effects pipeline. I'll take you through my process so you can process your video's through GIMP too.
You may need at least a little familiarity with the command line, FFMPEG and GIMP scripting to follow along.
First, I'll cut the video down to a decent length for this demo. I'll be using the public domain cinematic masterpiece known as 'Santa Clause Conquers The Martians', available here:
https://archive.org/details/santa_claus_conquers_the_martians_ipod
I've chosen to extract a particularly tense moment in the movie from 1:09:48 - 1:10:22. We can do that with FFMPEG like so:
ffmpeg -ss 01:09:53 -t 00:00:29 -i santa\_claus\_conquers\_the\_martians.mp4 -vcodec copy -acodec copy santa\_hostage.mp4
What we're doing here is saying starting at 1:09:48, we take 29 seconds and copy to the new file 'santa_hostage.mp4' without reencoding.
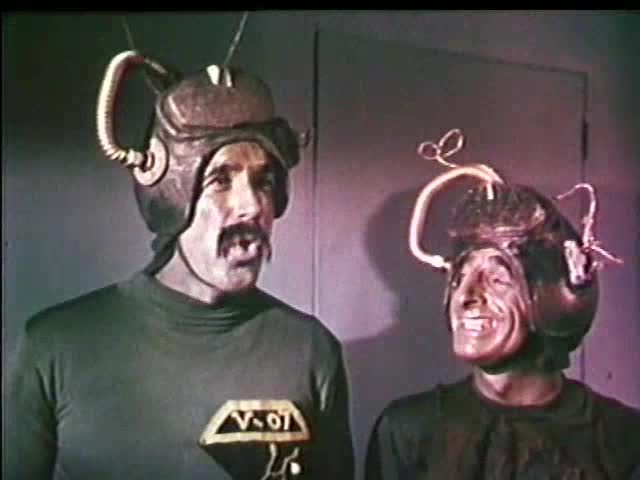
Next, we'll pull out a frame from the video so we can figure out what filters we need to run on the video frames to get the effect we want. I want one frame from 2 seconds after the start of the video and my source video is 640x480, so we do something like this:
ffmpeg -ss 2 -i santa\_hostage.mp4 -t 1 -s 640x480 -f image2 single.jpg
Images of Martians, direct from the Mars Curiosity Rover
I've already got a workflow for the crayon effect, so I want to try a new one with this video. There's a cool effect in G'MIC (available as a plug-in for GIMP here: http://gmic.sourceforge.net/) called 'Graphic novel'. Applying it straight to the image gives us a cool effect, but it looks a little rough due to the blockiness of the video. To remedy this I applied a 6px Gaussian blur first before applying the G'MIC effect. I think it improved it enough for our purposes.
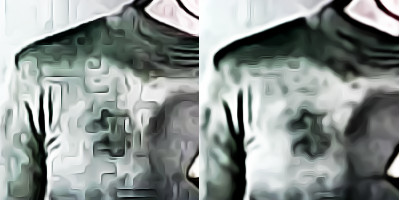
Half of a Martian shirt. Before and after ironing.
We could go crazy and layer other textures on or run it through more filters, but I like this as it is, so let's get to scripting.
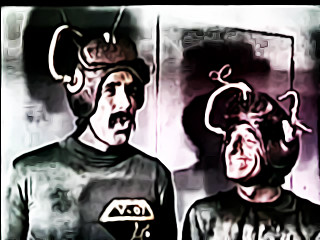
Martians - The Graphic Novel
Before we start let's define exactly what we want to do:
- Extract all the frames out of the video
- Apply a Gaussian blur of 6 pixels followed by the Graphic novel preset on the G'MIC plug-in.
- Compile all the frames back into a video
- Add audio from original video back into new video
I'm going to start small by only extracting a few frames to start and only take 6 frames per a second so I can also achieve a choppy/jerky effect. Once the GIMP script is finished we'll be able to go back and process the whole video.
ffmpeg -i santa\_hostage.mp4 -r 6 -t 1 -s 640x480 image%3d.png
The -r 6 indicates we only want 6 frames per second and image%3d.png means the images will be spit out numbered from 001 - 006.
Now we're ready to write a script to apply the effects, but first we need to know how to call the effects in the script. We can use the Procedure Browser ( Help->Procedure Browser ) and the Script-FU console (Filters->Script-Fu->Console) to manually enter them to make sure we get all the parameters correct.
After beginning to type in Gaussian we see all the different Gaussian blur plugins/options, plug-in-gauss-rle2 is the one I'll use. On the right all the parameters are listed that we need in order to run the plug-in.

As you'll see in the console, GIMP uses TinyScheme, so we can run the Gaussian blur plug-in on our image like this:
(plug-in-gauss-rle2 1 9 (car (gimp-image-get-active-layer 9)) 6 6)
The first parameter is 1 for RUN-NONINTERACTIVE, which means to run without presenting the plug-in's dialog box. The second parameter (9) is the image. We only need this number when we're testing in the console. It's displayed in the title bar.

Title bar showing the image ID
The third parameter is for the drawable. We'll grab the active layer for that. (gimp-image-get-active-layer 9) returns the active layer on the image, but it returns it as a list, so we use (car ) to return the first (and only) item in the list.
The last two parameters are the horizontal and vertical radius (in pixels) of the Gaussian blur.
If you run that through the Script-FU console you'll see the image get blurred. Success! Next, we just need to determine the command for the G'MIC plugin.
G'MIC is not just a GIMP plugin, it's a full featured framework that can be used for many image processing tasks. In the procedure browser plug-in-gmic takes the image, drawable, a layers mode, and a command to run on the image with G'MIC.
I have no idea what command the graphic novel preset runs, but after a little research it turns out it's really easy to get the command by running gimp directly from the console. As described here, if we run gimp from the console and turn on verbose output in the plugin we'll get our command.
./apply/ -v -99 -gimp\_graphic\_novelfxl 0,26.6667,9.74641,11.634,20,0,0.62,14,0,1,0.5,0.78,1.92,0,0,0,1,1,1,0.5,0.8,1.28
So our final command in the console is this:
(plug-in-gmic 1 9 (car (gimp-image-get-active-layer 9)) 1 "-gimp\_graphic\_novelfxl 0,26.6667,9.74641,11.634,20,0,0.62,14,0,1,0.5,0.78,1.92,0,0,0,1,1,1,0.5,0.8,1.28")
Running that command in the Script-Fu console works, so now we just need to throw both these commands into a GIMP batch script. Let's copy some boilerplate code from from the tutorial at gimp.org. You can see below, I've grabbed the last script on the page and modified it to run the two commands we need to get the effect we want.
(define (batch-graphic-novelfy blurnum)
  (let\* ((filelist (cadr (file-glob pattern 1))))
    (while (not (null? filelist))
      (let\* ((filename (car filelist))
        (image (car (gimp-file-load RUN-NONINTERACTIVE
                                    filename filename)))
        (drawable (car (gimp-image-get-active-layer image))))
        (plug-in-gauss-rle2 RUN-NONINTERACTIVE image
 drawable blurnum blurnum)
 (plug-in-gmic RUN-NONINTERACTIVE image drawable 1
 "-gimp\_graphic\_novelfxl 0,26.6667,9.74641,11.634,20,0,0.62,14,0,1,0.5,0.78,1.92,0,0,0,1,1,1,0.5,0.8,1.28")
        (gimp-file-save RUN-NONINTERACTIVE
                        image drawable filename filename)
        (gimp-image-delete image))
      (set! filelist (cdr filelist)))))
I named the script 'batch-graphic-novelfy' and added the two commands we want it to run. You can place as many commands as you need to produce the effect you want. You can run multiple filters, add layers, tweak layers, anything available in the procedure browser can be placed here.
As noted on the tutorial site this script uses the file-glob plug-in so we can pass in all our images. I've also changed the parameters for the image and drawable to the variables provided and added 'blurnum', so we can specify the number of pixels to blur on the command line in case we want to tweak it later.
Now we test it. The script needs to be moved into the scripts directory, I put mine in ~/.gimp-2.8/scripts. I like to keep them in a separate dir so I can version and edit it easier, so I actually place a symlink to the script in there.
Let's do this!
Alright, we're ready to go. Run this command and let's see the magic happen!
gimp -i -b '(batch-graphic-novelfy "\*.png" 6)' -b '(gimp-quit 0)'
Annnnnnnd, wait. What?
batch command experienced an execution error: Error: ( : 1) eval: unbound variable: pattern
Oops. I axed the pattern parameter out of the first line of the script. It should be:
(define (batch-graphic-novelfy pattern blurnum)
Let's try this again.
Take me to your leader!
You can throw together a quick gif with something like this: convert -delay 1x8 \*.png -coalesce -layers OptimizeTransparency animated.gif
Now we can put this all together in a bash script.
# graphic_novelfy.sh
Extract frames from video
ffmpeg -i $1 -r 6 -s 640x480 image%5d.png
Run frames through gimp filters
gimp -i -b '(batch-graphic-novelfy "\*.png" 6)' -b '(gimp-quit 0)'
Create video with processed frames
ffmpeg -r 6 -i image%5d.png -vcodec qtrle -r 29.97 -pix\_fmt rgb24 ${1}-novel.mov
Clean up
rm image\*.png
Add audio in from original video
ffmpeg -i $1 -i ${1}-novel.mov -vcodec copy -acodec copy -map 1:0 -map 0:1 -shortest ${1}.final.mov
BAM! We're done.
Run the script by passing in the video file you want to process and it spits out your processed video. If you're not to familiar with bash scripting the first parameter is accessed in the script as $1 or ${1} if you need to separate it from an adjacent string.
The only new command in the script is the ffmpeg command to combine the audio from the original file with the new video. The -map parameter tells ffmpeg which streams we want to take from the two input files. To find the correct streams just pass all your input files into ffmpeg without any further arguments like so: ffmpeg -i video1 -i video2
Done
Simply running a gaussian blur and one filter is just barely touching the surface of what we could do to a video.
The downside is that the video will have to be processed before editing, and running each frame through gimp will take some time. If you're running 24 or 30 fps video through gimp you'll want to test your effects on small clips before taking the time to run it through anything large.
The upside is the sheer amount of possibilities this opens up for video effects. Anything you can automate in gimp to manipulate an image can be used on a video.
See the final clip below.